Thursday, May 11, 2017

Teeny Tiny Lemon Meringues en Coquille d’Oeuf

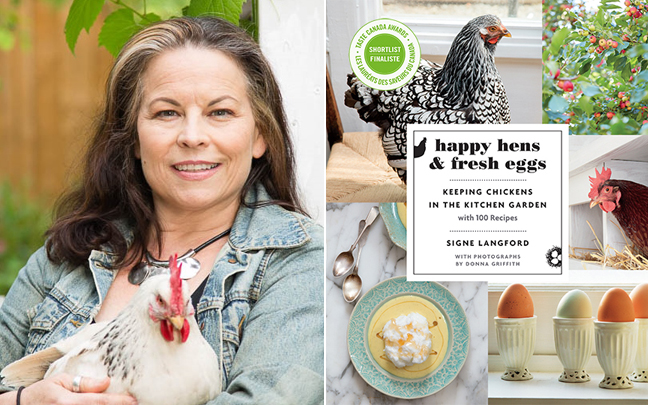
From the book Happy Hens & Fresh Eggs: Keeping Chickens in the Kitchen Garden – with 100 Recipes, ©2015, by Signe Langford, Photography by Donna Griffith. Published by Douglas & McIntyre. Reprinted with permission of the publisher.


By Signe Langford 


This dessert is about as sweet and adorable as a fluffy baby chick, and absolutely perfect for brunch. Once you decide you’re going to make this, you’ll need to start being very mindful about how you crack open the eggs you cook with; you’ll need to save up as many perfect shells as you wish to serve, with just the right opening near the top. If patience is not one of your virtues, go ahead and boil up as many as you need and make some egg salad!

Serve the filled shells in egg cups with wee spoons—avoid silver—and a few simple all-butter, not-too-sweet shortbread cookies. This recipe is also a perfect excuse to buy one of those nifty kitchen torches; you’ll need one to brûlée the meringue. If you’re not into the eggshell thing, any tiny vessel will do—espresso cup, liqueur glass, shot glass, sake cup, you get the idea—but the size will change and so will your amounts.

Ingredients:

1 ½ cups (350 mL) Light and Fluffy Citrus Curd, chilled (recipe below)

1 ½ cups (350 mL) French Meringue (recipe below)

⅓ cup (80 mL) vanilla super-fine or regular sugar

Directions:

Prepare 2 dozen eggshells to be used as serving cups (see sidebar for instructions). Place in serving cups and set aside.

Fill the prepared shells with chilled lemon curd; set aside.

Top each filled shell with a nice tall dollop of meringue, or get all fancy and pipe it on. Sprinkle each with a wee bit of the sugar and brûlée with a kitchen torch. You can also try it under the broiler, but it can be tricky and tippy and I don’t recommend it.

Light and Fluffy Citrus Curd


Makes 1 ½ –2 cups (350–475 ml)

The only lemon curd I tasted growing up came out of a jar. The grocery store kind was, and often still is, starchy, dull and overly sweet. When I made my first batch of homemade, it was mind-blowingly rich, tart and just so much better than anything out of a jar—even a jar all the way from England.

It’s one of those things that can be used in a number of ways: in a trifle, in tarts or tartelettes, between layers of cake, as a dessert topping, and on and on. It’s also a great gift, packed into pretty little jars.

On super-hot days I’ll put some curd in a bowl, tumble in some frozen blueberries and gently stir them in. After about 5 minutes in the fridge, the blueberries have softened just enough and it’s all wonderfully refreshing.

I call my version “lighter” because I use whole eggs, while most recipes call for just the yolks; I find the whites give a lighter, fluffier, prettier, pale yellow curd.

Go ahead and use any combination of citrus juice you like: lemon and lime, orange, blood orange and lemon . . . I also call for vanilla sugar, which isn’t the norm but I love that combination of lemon and vanilla. Feel free to use regular sugar if you prefer.

Ingredients:

½ cup (120 mL) vanilla sugar

½ cup (120 mL) freshly squeezed citrus juice

Zest of 1 lemon or other citrus fruit

4 free-run eggs

6 Tbsp (90 mL) butter, at room temperature, cut into chunks

Directions:

Into the top part of a double boiler or bain Marie whisk together the sugar and juice. The water should be simmering, not boiling. And be sure to use a whisk, to whip air into the curd.

From the book Happy Hens & Fresh Eggs: Keeping Chickens in the Kitchen Garden – with 100 Recipes, ©2015, by Signe Langford, Illustration by Sophie Sanders. Published by Douglas & McIntyre. Reprinted with permission of the publisher.

It’s important to keep a close watch on the heat; the temperature of the sugar and lemon should never be too hot, just warm. Carefully feel the sides of the bowl or double boiler—if it’s too hot, you will end up with a batch of sweet, lemony scrambled eggs.

If you want to be on the safe side, keep another pot or bowl to the side of the stove, full of ice water. If your mixture gets too warm, just rest the bottom into the ice water and whisk like mad. That will bring down the temperature in a hurry.

Now add the eggs and get ready to stand there and whisk vigorously for the next 20 minutes or so. Keep whisking and scrape down the sides with a rubber spatula so you don’t end up with a lot of overcooked curd clinging to the bowl or pot.

Once the mixture is starting to resemble curd—about the thickness of yogurt—whisk in the butter, one chunk at a time.

Once all the butter has been added and the curd is lovely and smooth and thick, set it aside to cool uncovered and at room temperature. Once it’s fully cooled, you can cover and store in the refrigerator.

French Meringue


Makes 10-12 individual meringues

The simplest type of meringue, just egg whites and sugar. It ends up crunchy and crumbly, and is used most often to make dessert nests or cups for fruit and custard and such, often piped into shapes before baking. This is also the classic lemon meringue pie topping.

Ingredients:

4 free-run egg whites

Up to 2 ¼ cups (530 mL) icing sugar

Directions:

Preheat oven to 200F (95C). Line a baking sheet with parchment paper, or lightly butter and dust with cornstarch or icing sugar. I prefer the parchment method.

Add the egg whites to a large bowl that you’ve wiped clean with a drop of vinegar or lemon juice. Using an electric beater on medium speed, whip until foamy.

Begin adding the sugar a bit at a time and continue to beat on medium speed until stiff and glossy. I like to give it a taste because my sweet tooth isn’t very strong; I don’t add all the sugar but you might like things a bit sweeter.

TIP: If you’re making the little individual lemon meringues in eggshell, pictured above, you can ignore the next steps, but I’m including them here so you know how to make a batch of meringue for another use too!

Here you can go either fancy or free-form. For fancy, transfer the mixture to a large piping bag or plastic freezer bag with one bottom corner snipped off and pipe the meringue onto the prepared baking sheet in whatever shapes you desire.

For free-form, simply use a spoon to dollop, slightly flatten and spread piles of meringue onto the prepared baking sheet in the shapes and sizes you desire.

Pop the sheet in the oven and bake for about 3 hours or until the meringues lift from the sheet easily and feel completely dry and light. Some chefs suggest propping the oven door open just a smidge so it doesn’t overheat; you know how precise and well-behaved your oven is, so use your own judgment.

Remove from oven and let cool completely before storing, or they may soften again. Store at room temperature in a covered container.

Recipe from the book Happy Hens & Fresh Eggs: Keeping Chickens in the Kitchen Garden – with 100 Recipes, ©2015, by Signe Langford, Photography by Donna Griffith. Published by Douglas & McIntyre. Reprinted with permission of the publisher.

Bookmark this post with a Pin.

About the author:


Signe Langford is a restaurant-chef-turned-writer who tells award-winning stories and creates delicious recipes. She is a frequent contributor to the Globe and Mail, National Post, Toronto Life, Canadian Living and Garden Making magazines. In 2105, Signe published her first book Happy Hens & Fresh Eggs; Keeping Chickens in the Kitchen Garden- with 100 Recipes
Raised in the town of Hudson, Quebec Signe grew up surrounded by an ever changing menagerie of critters, both wild and domestic, and her special affection for all feathered creatures has never flagged. At present, she shares a downtown Toronto Victorian with a tiny flock of laying hens. For more stories and recipes please visit www.signelangford.com

Photographer Donna Griffith is based in Toronto. She has taken photographs of food and drink, homes and gardens for a number of publications and books.

Artist Sophie Sanders specializes in hand-made and printed linocuts and ink drawings.

The Coconut Every Day: A Cookbook Review


If there ever was a beauty contest held for fruit, coconut wouldn't stand a chance against stronger competitors like apples or peaches! On the surface of things, there is so little to recommend coconuts: they're ugly, brown and hairy.

Though they are often misidentified as a nut, technically coconuts are classified as a fibrous one-seeded drupe. A drupe is fruit with an outer layer, a fleshy middle and a hard woody layer that surrounds a seed.

Coconut seems to become hugely popular in the last few years. Though it's probably always been good for you, coconut is the latest "superfood".  Many celebrity chef's, who used to prepare food with extra virgin olive oil, seem to have switched to coconut oil instead. I've watched this growing trend with curiosity, but was uncertain as to where to begin to incorporate more coconut into our diet.


Then I happened on this cookbook: Coconut Every Day by Sasha Seymour. It was by a Canadian author whose food styling I had admired in so many magazines. The short lists of ingredients and simple preparation appealed to me as well. 

Coconut "every day" was going to be a stretch for me. The only coconut in my pantry was a few cans of coconut milk that I used whenever I made curry! I was very grateful for the introduction to the book that introduced me to coconut oil, flour and sugar and water. I made a shopping list and started working my way through some of the recipes.


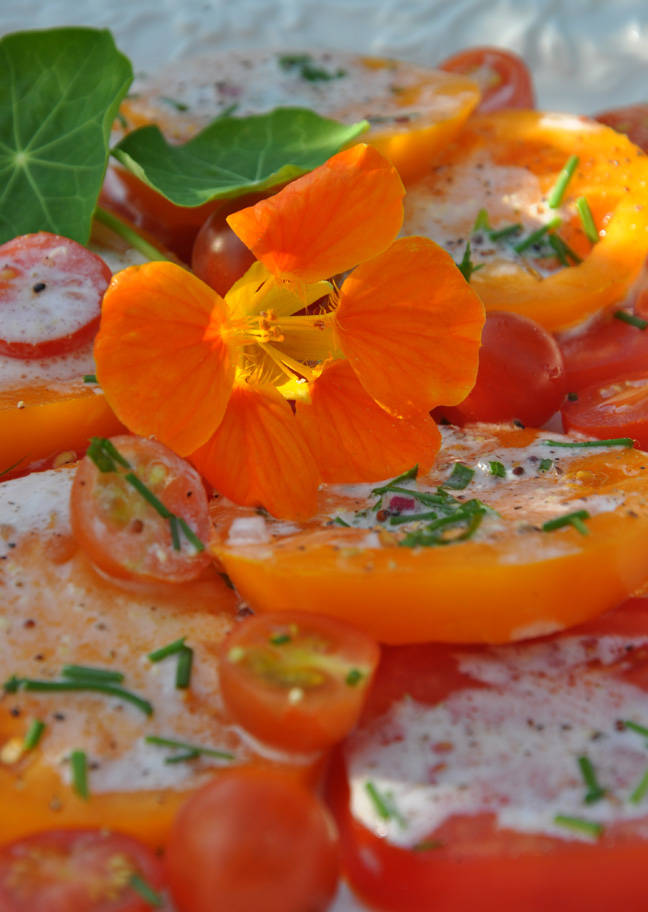
Tomatoes with Salad Cream


Really good tomatoes, picked at the height of summer, really don't need much in the way of dressing. They're delicious all on their own. Tomatoes drizzled with a light "salad cream" sounded even better, so I wanted to try it.

This dressing takes mere minutes to make. A splash of red wine vinegar and a few teaspoons of dijon mustard are a nice counterbalance to the rich, creaminess of the coconut milk and olive oil. A finely diced shallot, a pinch of salt and a little freshly ground black paper round out the flavours As in the cookbook, I chopped chives from the garden and sprinkled them over the whole plate of tomatoes. 


The salad cream was terrific and so much better than anything you might find in a store-bought bottle. 

I would certainly make this dressing again. The only thing I might do next time is cut the amounts in half. The half a cup of coconut the recipe calls for makes quite a lot of dressing! You could store the extra dressing in the fridge I suppose, but I think I prefer to make it up as needed.


Peanut Butter Coconut Cookies


Do you ever find yourself questioning a recipe as you are making it? I have! I am a terrible one for second guessing recipes. Then I catch myself recalling something Ina Garten's wrote in one of her many fabulous cookbooks. Ina maintains that you owe it to the recipe to give it at least one try as written before you start experimenting with your own variations.

So even though I was deeply troubled that Coconut Every Day's recipe for peanut butter cookies lacked body with just 2 scant tablespoons of brown rice flower, I followed the recipe as is and filled a baking sheet with cookies. 

In the hot oven, my cookies dough melted into flat round blobs!

Before I baked the next batch, I added a quarter cup of flour. They came out perfectly! I don't know what to tell you. If I made them again, I'd alter the recipe.


How were the cookies? Creamy peanut butter, toasted coconut and dark chocolate chunks? 

What's not to love!


Cream of Wild Mushroom Soup

Coconut and earthy mushrooms may seem like an odd mix, but I was surprised to discover that the two flavours compliment one another in an unexpected way. This soup recipe starts with garlic, thyme and some leeks which are sautéed in a little coconut oil. The fragrance wafting from the pot will make you feel as though you've taken a tropical vacation!

Next, in go the mushrooms. When they are nicely browned, wine, chicken stock and water are added and brought to a boil. After 30 minutes the pot is removed from the heat. Lemon juice brings a hint of freshness, while coconut milk adds creaminess to the soup. A dash of tamari sauce darkens the color.

A portion of the mixture is purred in the blender to thicken the soup, but some generous pieces of mushroom are left to be discovered as treasures buried deep in the bowl.

This soup was another hit. I've already made it twice. The coconut milk has a slight edge to it that's a little like sour cream and the leeks are so much more interesting than a plain old onion.


Middle Eastern Chopped Salad with Tahini


The final thing I wanted to try for this review was another dressing. When I was in college I worked in a vegetarian restaurant that has its own signature salad dressing. Tahini was a key ingredient. I remember the nutty taste of that dressing so very fondly! When I saw that Coconut Every Day included a salad dressing that was made with tahini, I had to try it.

Sadly, I was a bit disappointed this time. Tahini can have a certain bitterness (To be fair to the author, I must admit that I like things on the sweet side. Raw peanut butter for instance, is not sweet enough for my taste.) and so I ended up adding a little honey to the finished dressing.

All in all I was really pleased with the recipes from Coconut Every Day. If you too are curious about all things coconut, I think you'll find that it's a excellent place to begin.


Here are links to some online recipes from Coconut Every Day:


More Information and Links:

Interview with Sasha Seymour.
Take a tour of Sasha Seymour's townhouse courtesy of House and Home TV.

Saturday, April 15, 2017

Chef Christine Cushing’s Easter Tsoureki

From the book Happy Hens & Fresh Eggs: Keeping Chickens in the Kitchen Garden – with 100 Recipes, ©2015, by Signe Langford, Photography by Donna Griffith. Published by Douglas & McIntyre. Reprinted with permission of the publisher.

An excerpt from Happy Hens and Fresh Eggs: Keeping Chickens in the Kitchen Garden–with 100 Recipes by Signe Langford. Many thanks to Signe and her publisher Douglas & McIntyre for allowing me to share this recipe here– Jennifer


Post By Signe Langford 


Tsoureki is a traditional Greek Easter egg-bread recipe, a gorgeous golden braided loaf with dyed-red Easter eggs baked right in.

I called on my friend, Chef Christine Cushing to share her family’s recipe and her know-how for my book, Happy Hens & Fresh Eggs; Keeping Chickens in the Kitchen Garden and here it is! Traditionally, the eggs are dyed with onion skins, giving them a very subtle hue indeed. I wanted a little more pizzazz, so I added some beet juice to the water when dying mine.

Chef Cushing shares these reminiscences about a Greek childhood Easter:

“My grandmother came from the beautiful island of Crete at a time when there wasn’t much wealth or excess, and despite that she was so particular about everything she ate and impressed upon me at an early age how important the quality of the ingredients was. Our tradition of dyeing Easter eggs and making this fragrant, delicious Easter bread started for me when I was a teenager and Yia Yia (that’s Greek for Grandma) told me about how different the eggs were in Crete. I don’t think I fully appreciated that until I first went to cooking school in Paris and then on my first visit to Crete a decade ago."

“Easter isn’t Easter unless I make this bread,” says Chef Cushing, who was born in Greece, raised in Canada and has proudly served as the family keeper of this Easter tradition since the age of 12. “I used to camp out in sleeping bags in the living room with my cousins so we could set the timer and sleep between risings—it took me all night.”

Here's Chef Christine Cushing's Greek Easter Egg-bread Recipe:

MAKES 3 LOAVES

Ingredients:

4–4½ cups (950–1060 mL) all-purpose flour, divided

1 tsp (5 mL) sea salt

1½ tsp (7.5 mL) ground mahlepi (cherry stones), available at specialty Greek stores

1 tsp (5 mL) ground mastiha (hardened resin of the mastic tree), also available at specialty Greek stores

Zest of 1 lemon

Zest of 1 orange

¹⁄3 cup (80 mL) warm water (about 98F/37C)

¾ cup + 1 Tbsp (180 + 15 mL) sugar, divided

½ oz (14 g) active dry yeast

½ cup (120 mL) warm 3.5 percent milk
(about 98F/37C)

4 free-run eggs, divided

¹⁄3 cup (80 mL) melted butter

About ¼ cup (60 mL) chunky sugar for a final sprinkle (optional)


Preheat oven to 350F (180C). Line 3 baking sheets with parchment paper and set aside.

In the bowl of a stand mixer using the dough-hook attachment, or in a large bowl with a wooden spoon, combine 4 cups (950 mL) flour, salt, mahlepi, mastiha and the zests.

In a small bowl, combine warm water, 1 table-spoon (30 mL) of the sugar and yeast; stir and let stand 5 minutes or until frothy.

Meanwhile, in a medium bowl, whisk together warm milk, 3 of the eggs, remaining ¾ cup (180 mL) sugar and melted butter; set aside.

Add yeast mixture to flour mixture and blend on low speed, or stir to combine.

Add the egg and milk mixture to the flour and yeast and continue to mix (on low) until dough is sticky and begins to come together.

Turn the dough out onto a well-floured surface and knead, adding more flour as required; the dough may not require the full amount of flour. It should be smooth and elastic but slightly sticky to the touch. The process should take about 10 minutes.

From the book Happy Hens & Fresh Eggs: Keeping Chickens in the Kitchen Garden – with 100 Recipes, ©2015, by Signe Langford, Photography by Donna Griffith. Published by Douglas & McIntyre. Reprinted with permission of the publisher.

Place in a well-buttered bowl, cover with plastic wrap or a damp tea towel and let rise in a draft-free area at room temperature for 90 minutes, or until doubled in size.

From the book Happy Hens & Fresh Eggs: Keeping Chickens in the Kitchen Garden – with 100 Recipes, ©2015, by Signe Langford, Photography by Donna Griffith. Published by Douglas & McIntyre. Reprinted with permission of the publisher.

Punch down and transfer to floured counter. Gently pat into a rough rectangle of about 7 x 23 inches (18 x 58 cm). Cut dough length-wise with pastry cutter or knife into 9 equal strands.

From the book Happy Hens & Fresh Eggs: Keeping Chickens in the Kitchen Garden – with 100 Recipes, ©2015, by Signe Langford, Photography by Donna Griffith. Published by Douglas & McIntyre. Reprinted with permission of the publisher.

Working with one strand at a time, gently hold each end and tap like skipping rope on the counter until slightly and evenly stretched. Repeat with 2 other strands, then braid the 3 strands together, tucking the ends under to fasten. If desired, place red-tinted hard-boiled eggs (kokkina avga; see below for instructions) between the strands of the braids. Transfer braid onto a baking sheet. Repeat with remaining dough to form 3 braids, each on a separate baking sheet.

Cover with a floured tea towel and let the braids rise in a warm place for about 50 minutes, or until the dough does not spring back when pressed with a fingertip.

Beat remaining egg and brush egg wash over loaves. If desired, sprinkle with sugar while egg wash is still wet; coloured sugar would be fun for the kiddos and very festive.

Bake loaves on middle rack of preheated oven for 35 minutes, or until golden and hollow when tapped on bottom.

 Making Traditional Greek Red Easter Eggs


The traditional Greek way to make red Easter eggs (kokkina avga) is to boil them up in a whack of onion skins, so I suggest you plan on making a big pot of onion soup or caramelized onions, which are fine for freezing, canning or eating on just about anything! Or—and don’t tell Yia Yia— do what I do, and use beet juice or red wine.

This post was written by Signe Langford

From the book Happy Hens & Fresh Eggs: Keeping Chickens in the Kitchen Garden – with 100 Recipes, ©2015, by Signe Langford, Photography by Donna Griffith. Published by Douglas & McIntyre. Reprinted with permission of the publisher.


Read Signe's other Easter post about making Easter Eggs with natural dyes here.


About the Author

Signe Langford is a restaurant-chef-turned-writer who tells award-winning stories and creates delicious recipes. She is a frequent contributor to the Globe and Mail, National Post, Toronto Life, Canadian Living and Garden Making magazines. In 2105, Signe published her first book Happy Hens & Fresh Eggs; Keeping Chickens in the Kitchen Garden- with 100 Recipes
Raised in the town of Hudson, Quebec Signe grew up surrounded by an ever changing menagerie of critters, both wild and domestic, and her special affection for all feathered creatures has never flagged. At present, she shares a downtown Toronto Victorian with a tiny flock of laying hens. For more stories and recipes please visit www.signelangford.com

Photographer Donna Griffith is based in Toronto. She has taken photographs of food and drink, homes and gardens for a number of publications and books.

Chef Christine Cushing is a celebrity chef and television programme host. She is a resident chef on the Marilyn Dennis Show. She has written three cookbooks and has her own line of artisan food products.

Super Easy Devilled Eggs with Herbs


Devilled eggs seem to be a rather uninspired thing to serve at Easter time, but they are one of those quintessential appetizers that seems to make it onto almost everyone's plate. They're finger food at its most convenient; creamy morsels that slide easily into your mouth and disappear in a bite or two.

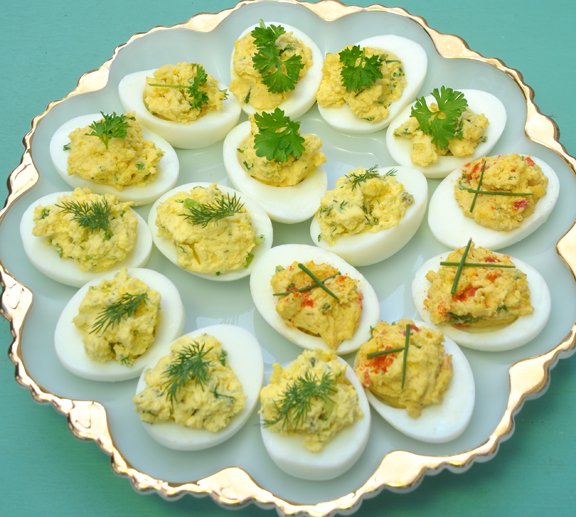
I love traditional devilled eggs with mayonnaise and a dusting of paprika, but sometimes it's fun to change things up a bit. Here are some really simple variations on the tried and true classic. They are flavour combinations that are purposely simple with herbs that are easy to find in any grocery store.


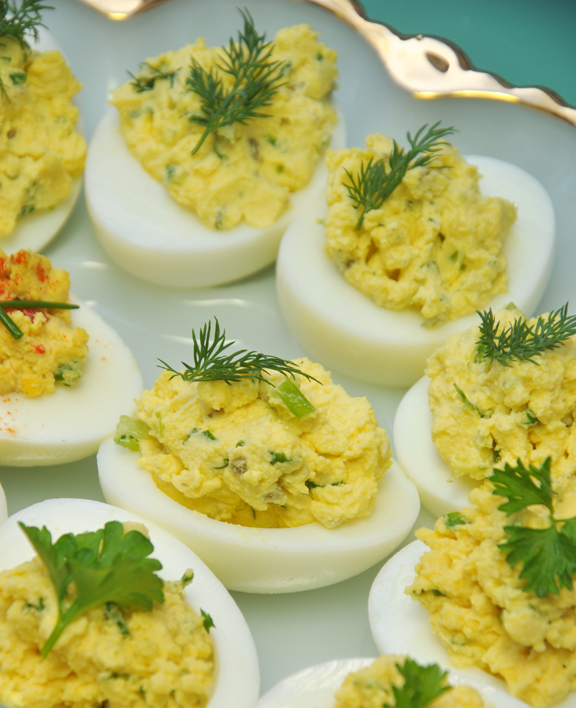
Devilled Eggs with Tzatziki & Dill

Makes 6 Eggs

6 hard boiled eggs cooled and halved
2 generous tbsp of tzatziki
1 generous tbsp of half-the-fat mayonnaise
1 gherkin pickle finally diced
the light green section of two green onions
1 tsp fresh dill finely choped
1 tbsp of parsley finely chopped (I used curly parsley)
a sprig of dill to garnish

A "generous" tablespoon of tzatziki

Remove the yellow yokes from 6 hard boiled eggs and put them into a wide-mouth bowl.

Add the tzatziki and the of half-the-fat mayonnaise.

Mash the yokes, tzatziki, and mayonnaise with a fork until smooth and creamy.

Mix in a finely diced gherkin pickle.

Finely chop the light green section of the green onions. Don't use the white part of the onion (too strong) or the tops of the green leaves (they can be tough).You want the light-green segment right in the middle. Add the onions to your bowl.

Finely chop and add the parsley and dill.

Mix everything together with a spoon.

Spoon the egg yoke filling back into the white part of the egg and garnish with a sprig of dill.


Devilled Eggs with Humus & Parsley

Makes 6 Eggs

6 hard boiled eggs cooled and halved
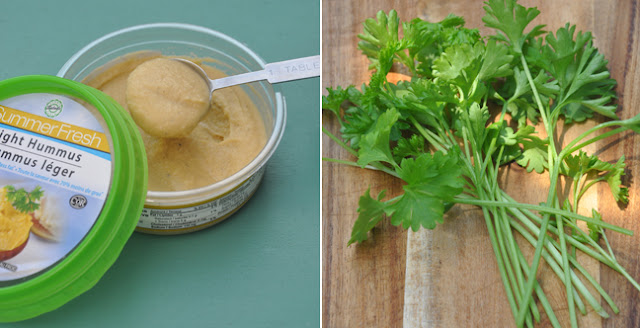
2 generous tbsp of light-Humus
2 generous tbsp of half-the-fat mayonnaise
1 tsp of lemon zest
2 tsp of lemon juice
1tbsp of freshly chopped parsley
1 tbsp of chopped chives
pinch of black pepper


Remove the yellow yokes from 6 hard boiled eggs and put them into a wide-mouth bowl.

Add the light-Humus and the half-the-fat mayonnaise.

Grate and add the lemon zest. Then add the lemon juice.

Mash the yokes, humus, mayonnaise, lemon zest and juice with a fork until smooth and creamy.

Add the parsley and chives. Grind in a little bit of fresh black pepper.

Mix everything together with a spoon.

Spoon the egg yoke filling back into the white part of the egg. Garnish with a sprig of parsley.


Curried Devilled Eggs with Chives

Makes 6 Eggs

6 hard boiled eggs cooled and halved
3 generous tablespoons of half-the-fat mayonnaise
1/2 tsp of mild curry powder
1/2 tsp of cumin
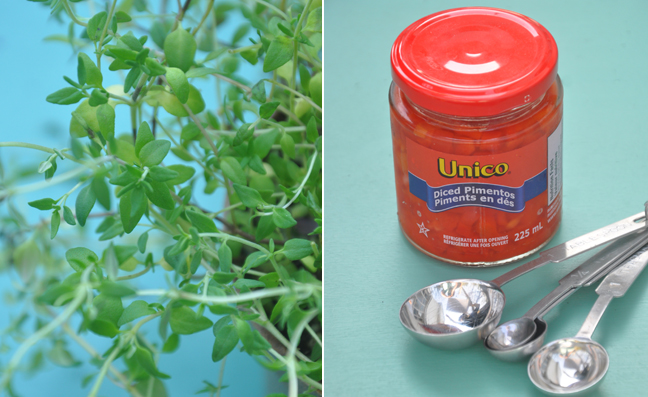
1 tbsp of thyme chopped
1 tbsp of diced red pimentos
1 tbsp of parsley chopped (I used curly parsley)
fresh black pepper
sprinkle of paprika

Remove the yellow yokes from 6 hard boiled eggs and put them into a wide-mouth bowl.

Add the half-the-fat mayonnaise.

Add the mild curry powder and cumin.

Mash the yokes, mayonnaise and spices with a fork until smooth and creamy.


Finely dice the red pimentos and add them to the yoke mixture.

Remove the leaves from sprigs of thyme and chop them finely. Then finely chop some parsley. Add both herbs to the egg yoke mixture. Grind in a little bit of fresh black pepper.

Mix everything together with a spoon.

Spoon the egg yoke mixture back into the white part of the egg. Dust with paprika and garnish with a couple of sprigs of chives.


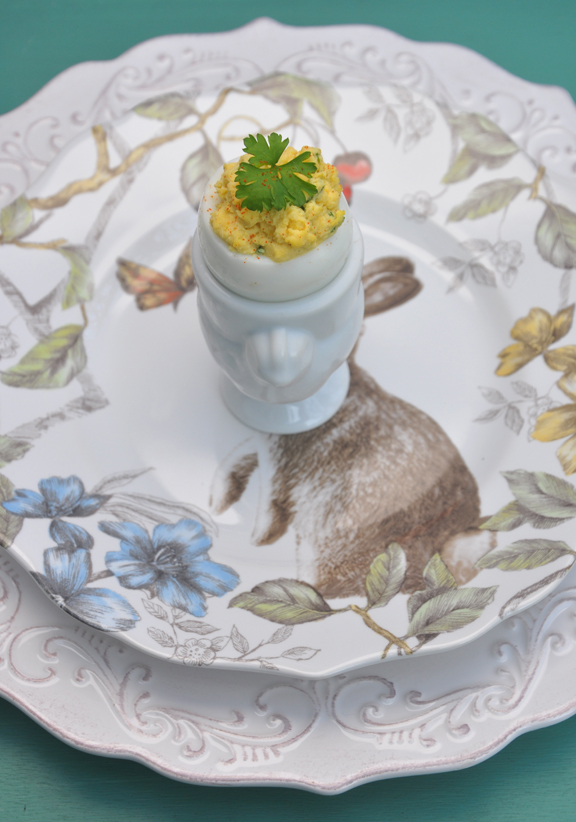
If you have the patience for a devilled egg that is a bit more finicky to make, you can try slicing off the top third of your hard boiled egg and stuffing it from the top.


Let me know if you try out any of these ideas, I'd love to hear how your devilled eggs turn out.