There is nothing logical about my desire to have my own backyard hens. Yes, chickens would serve a practical purpose, and yes, it would be wonderful to have really fresh eggs, but my long held desire for a small flock of birds is not in any way rational, it's all about the heart. I've always loved the idea of having my own chickens. I can't explain it.
For me a garden is more than a place for pretty flowers. I'd like my garden to be a home for a whole range of critters; a place where bees buzz, birds nest and butterflies flit from flower to flower. I know that, as a gardener, I should hate seeing a baby rabbit on sight, but instead I feel oddly honoured that Mama has selected my garden as the perfect spot to raise her young offspring. Perhaps if the garden were overrun with rabbits, I might feel differently, but as it is, I find it hard to begrudge the occasional baby bunny a meal. Yes, there will be a few decapitated plants, but I am always happy to share!
So what holds me back from keeping my own chickens? Time? Perhaps. Money? Maybe. But mostly it's lack of confidence. I am not even sure where to begin. Perhaps you feel the same way.
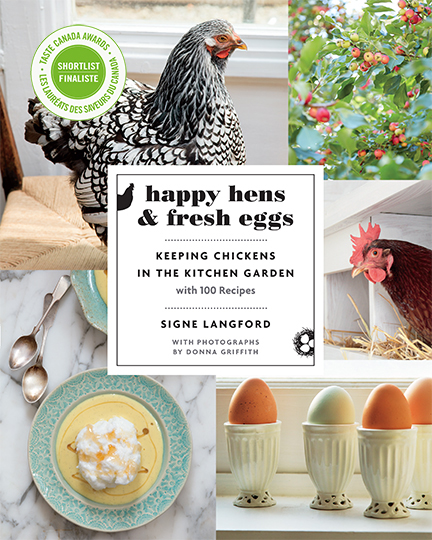
And that's where a book like Happy Hens and Fresh Eggs; Keeping Chickens in the Kitchen Garden with 100 Recipes comes in.

From the book Happy Hens & Fresh Eggs: Keeping Chickens in the Kitchen Garden – with 100 Recipes, ©2015, by Signe Langford, Photography by Donna Griffith. Published by Douglas & McIntyre. Reprinted with permission of the publisher.

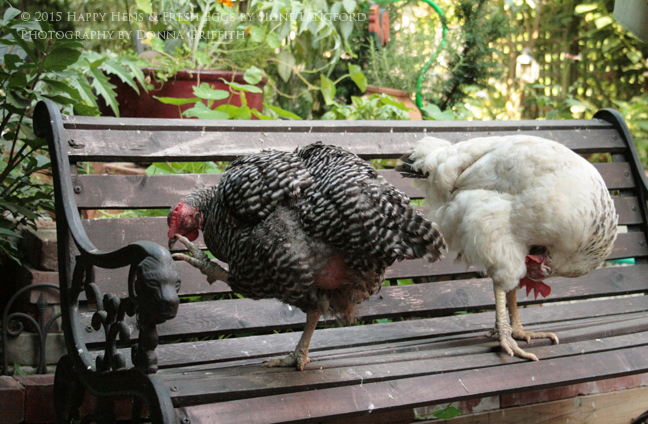
From the book Happy Hens & Fresh Eggs: Keeping Chickens in the Kitchen Garden – with 100 Recipes, ©2015, by Signe Langford, Photography by Donna Griffith. Published by Douglas & McIntyre. Reprinted with permission of the publisher.
In addition to tending her family's flock as a child, Signe Langford has discreetly kept chickens in her Toronto backyard for almost a decade. She writes about her chickens with such joy it's contagious! The book moves through the seasons offering practical advice on issues as they are likely to arise. When I started reading, I had lots of questions about housing hens (How do you keep them warm in winter? How do hens handle heat of summer?) and worries about dealing with possible predators (In the river valley where we live, we have coyotes, foxes and racoons). I am glad that Signe also covers the best breeds for backyards and what to feed hens to keep them happy and healthy.
From the book Happy Hens & Fresh Eggs: Keeping Chickens in the Kitchen Garden – with 100 Recipes, ©2015, by Signe Langford, Photography by Donna Griffith. Published by Douglas & McIntyre. Reprinted with permission of the publisher.
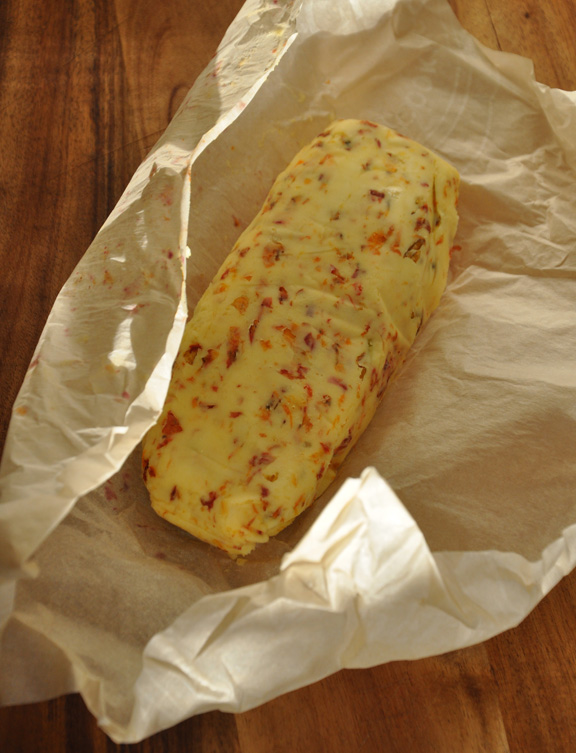
As well as being a book about keeping chickens, Happy Hens & Fresh Eggs: Keeping Chickens in the Kitchen Garden, with 100 Recipes is a cookbook. Included are dozens of simple and elegant recipes from Signe's own kitchen, as well as recipes from celebrity contributors like Laura Calder, Vikram Vij, Roger Mooking, Meeru Dhalwala and John Higgins.
Even the most basic recipes in the book, like the one for devilled eggs, comes with an interesting twist. I would be curious to follow Signe's directions to salt-cure some egg yolks and grate them over some fresh pasta. There are also drink recipes that are super fun too. This summer I must try making the book's pretty-looking raspberry-rose cocktail. The addition of an egg white makes the drink frothy and smooth.

From the book Happy Hens & Fresh Eggs: Keeping Chickens in the Kitchen Garden – with 100 Recipes, ©2015, by Signe Langford, Photography by Donna Griffith. Published by Douglas & McIntyre. Reprinted with permission of the publisher.
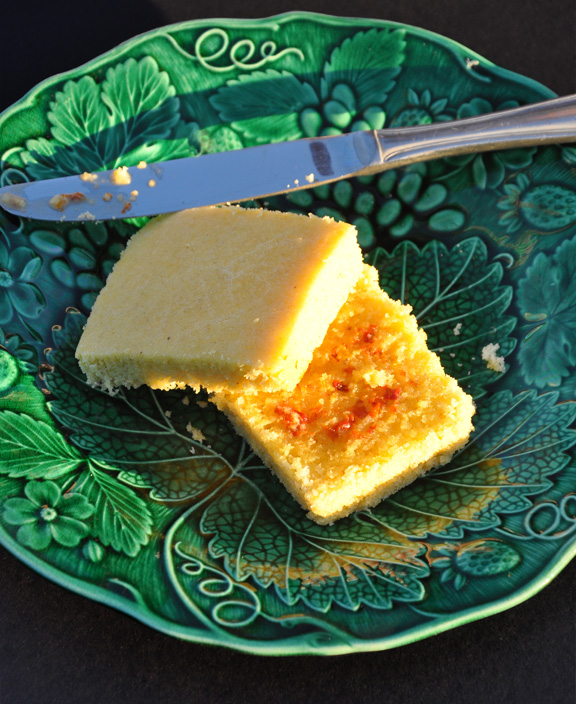
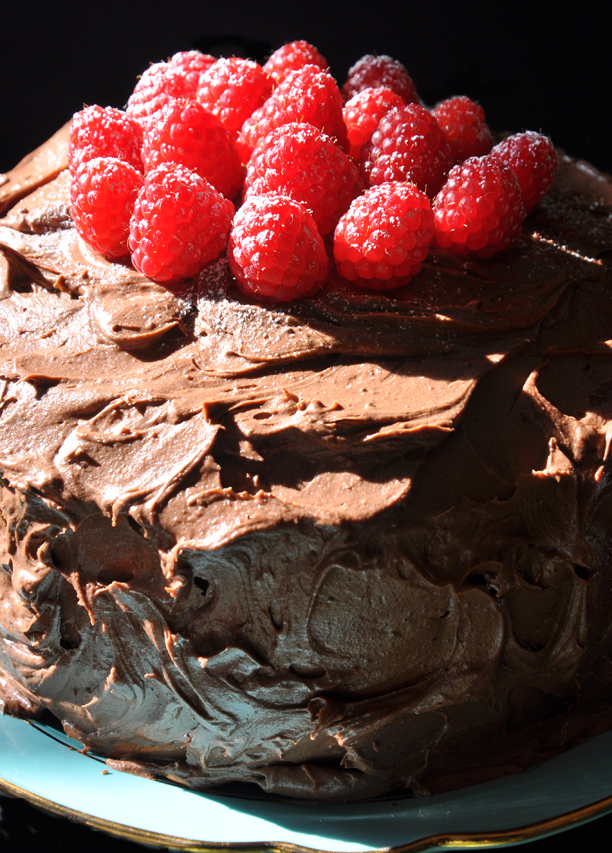
How adorable are the "Teeny tiny lemon meringues en coquille d'oeuf" (seen above) from the book? And there are other delicious looking desserts like a sumptuous, raspberry-topped chocolate chiffon cake and a creamy-looking vanilla `a la crème that swims in a puddle of blueberry maple compote. I am dying to try the recipe contributed by Laura Calder for a creamy custard dessert that is topped with soft meringues that have been delicately poached in vanilla-infused milk.

From the book Happy Hens & Fresh Eggs: Keeping Chickens in the Kitchen Garden – with 100 Recipes, ©2015, by Signe Langford, Photography by Donna Griffith. Published by Douglas & McIntyre. Reprinted with permission of the publisher.
I will end this post with a recipe from the book that Signe and her publisher Douglas &McIntyre have kindly allowed me to share. Wouldn't this omelette make a great holiday breakfast?
Sweet Lingonberry Jam Omelette
Serves 2 for breakfast or dessert
" The first dinner a boy ever cooked for me was an omelette; um... it was a night of other momentous firsts. I have a thing for omelettes. Omelette soufflée à la confiture is sweet and light, like our memories of youth.
And although "confiture" means jam or preserve, any sweet fruit spread or purée will work; I dare say, Light and Fluffy Citrus Curd (recipe on page 111 in the book) would be brilliant."
Signe Langford
1/4 cup (60 ml) homemade or excellent-quality store-bought lingonberry jam, at room temperature
1/3 cup (80 ml) mascarpone, at room temperature
1 Tbsp (15 ml) freshly squeezed lemon juice
3 free-run eggs, separated
2 Tbsp (30 ml) super-fine vanilla sugar, divided
Pinch of fine sea salt
2 Tbsp (30 ml) butter, divided
2 tsp (10 ml) icing sugar for garnish (optional)
In a medium bowl, add the jam, mascarpone and lemon juice and stir well to fully combine. Set aside.
Place egg yolks and 1 tablespoon (15 ml) of the vanilla sugar in a medium bowl and whisk until pale, creamy and beginning to thicken.
Place egg whites in a large bowl that has been wiped out with a drop of lemon juice and a clean kitchen towel. Add the remaining tablespoon (15ml) of sugar and a pinch of salt, and using electric beaters or a stand mixer with the whisk attachment, beat the whites until stiff peaks form.
Using a rubber spatula, gently fold the whites into the yokes until well combined, being careful not to collapse the whites.
Place a 10-to 12-inch (25-to 30-cm) skillet over medium heat. Add 1 tablespoon (15ml) of butter, melt and swirl around the skillet. Pour in the egg mixture and spread out to the edges, patting it down a bit. Cook for about 2-3 minutes, or until the eggs just set. Do not let the omelette brown.
Using either an offset spatula or an egg flipper, slide around the edges and underneath to make sure there are no stuck bits. When you're sure the omelette is loose, set a plate on top of the skillet and flip it over; the omelette should drop onto the plate. Wait a second and listen for the soft "plunk"!
Return the skillet to the heat and add the remaining butter; melt and swirl the butter, then slip the omelette back into the skillet. Continue to cook for 2 to 3 minutes, or until the egg looks just set.
While the second side is cooking, spoon the jam-mascarpone filling over one half of the omelette. Tip the skillet, and with the help of the spatula, slip the omelette onto a serving platter, then fold the omelette in half. It won't be perfect— it shouldn't be perfect— the filling should be peeking out suggestively! Or, and this is my preferred way, skip this last stressful step and eat right out of the pan, tête-à-tête style.
Dust with icing sugar, if you care to, and serve immediately.
Recipe from the book Happy Hens & Fresh Eggs: Keeping Chickens in the Kitchen Garden – with 100 Recipes, ©2015, by Signe Langford, Photography by Donna Griffith. Published by Douglas & McIntyre. Reprinted with permission of the publisher.

Signe Langford
More about the book's contributors:
Author Signe Langford is a chef, Toronto-based food writer and a backyard chicken enthusiast. She is a frequent contributor to the Globe and Mail, National Post, Toronto Life, Canadian Living and Garden Making magazines. Visit the author's website.
Donna Griffith is a Toronto-based photographer who taken photographs of food and drink, homes and gardens for a number of publications and books.
Artist Sophie Sanders specializes in hand-made and printed linocuts and ink drawings.
Publisher Douglas & McIntyre has given me a copy of Happy Hens & Fresh Eggs: Keeping Chickens in the Kitchen Garden, with 100 Recipes to give away. Because we will have to send this book through the mail, I will have to limit entry in the draw to readers in Canada and the USA.
Please leave a comment below, if you would like to be included in the book draw. The draw will remain open for the until January 1st. If you are not a blogger, you can enter to win by leaving a comment on the Three Dogs in a Garden Facebook page. You are also welcome to enter by sending me an email (jenc_art@hotmail.com).

Bookmark this post with a Pin.